# System Utility
System utility feature enables configurations related to FundMaster integration with other systems. To configure specific utilities, click the menu items to open configuration dialog boxes as shown below:
Note: system utility configurations are confidential settings and therefore has not been demonstrated using sample system screenshot.
# Integration
Click this link to open a dialog box to configure parameters related to FundMaster integration with other external systems.
# Mobile Money Middleware Integration Settings
Click this link to open a dialog box to configure parameters related to FundMaster integration with other various mobile money service providers.
# Database links
Click this link to open a dialog box to configure parameters related to connecting FundMaster to vender-based databases.
# Straight To Bank Config
Click this link to open a dialog box to configure IPAs related to FundMaster integration with partnering banking institution for money transactions.
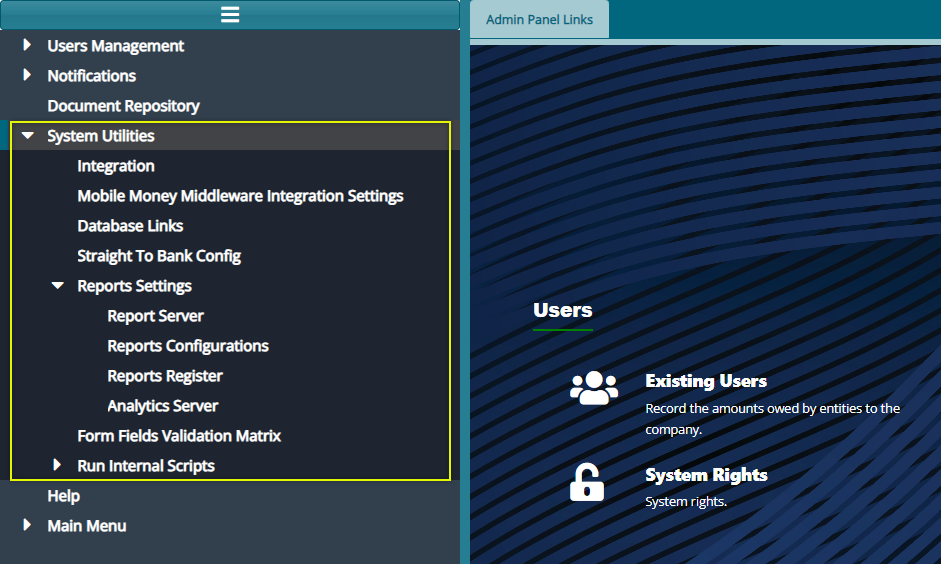
# Report Settings
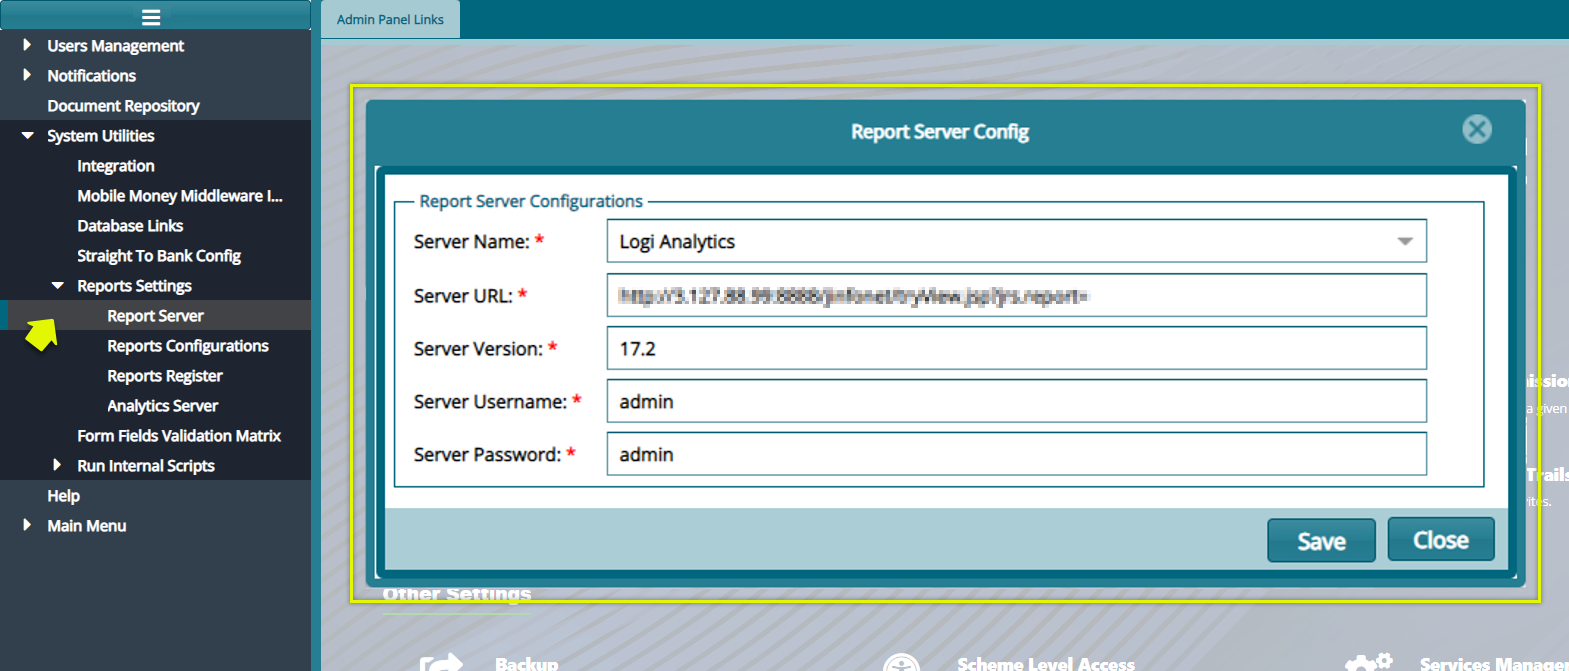
# Report Server
Click the 'Report Server' menu item to open a Report Server Config dialog box to configure settings that enables FundMaster to connect to a report server as shown in the screenshot below:
# Reports Configurations
Click the 'Reports Configurations' menu item to open a reports configurations dialog box to configure settings that enable a scheme to connect to a report server as shown in the screenshot below:
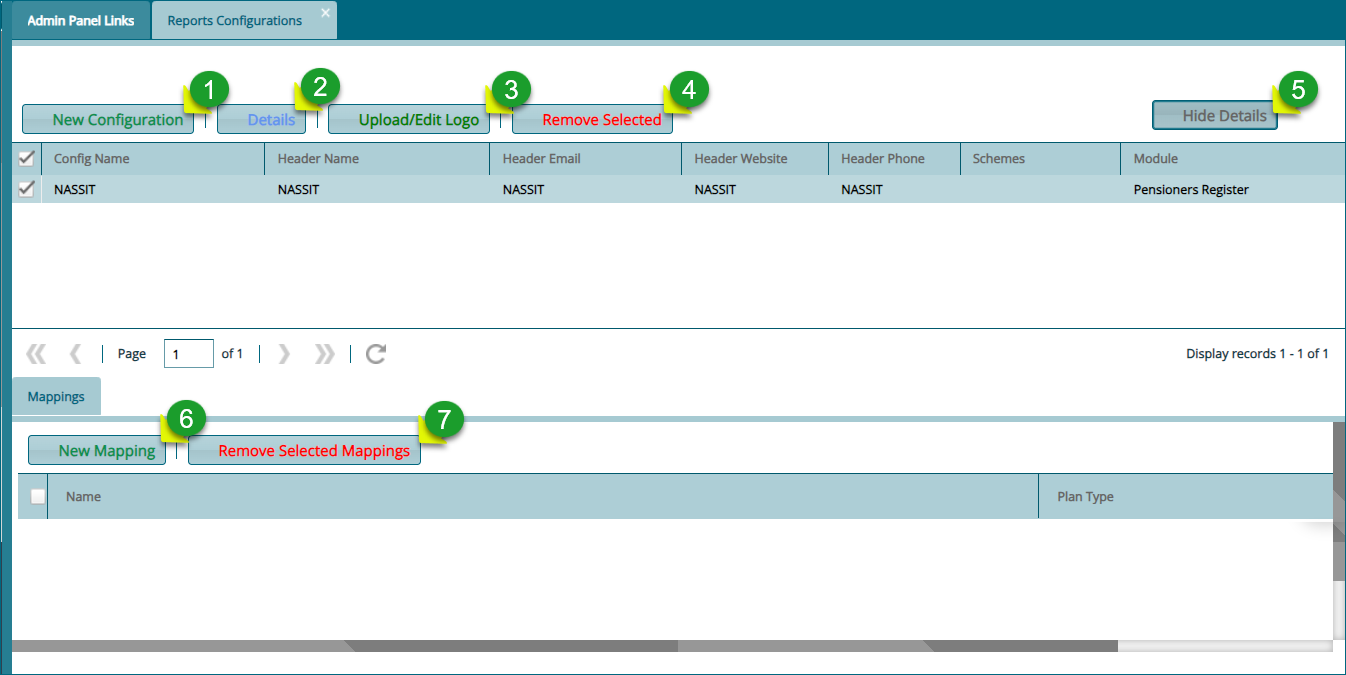
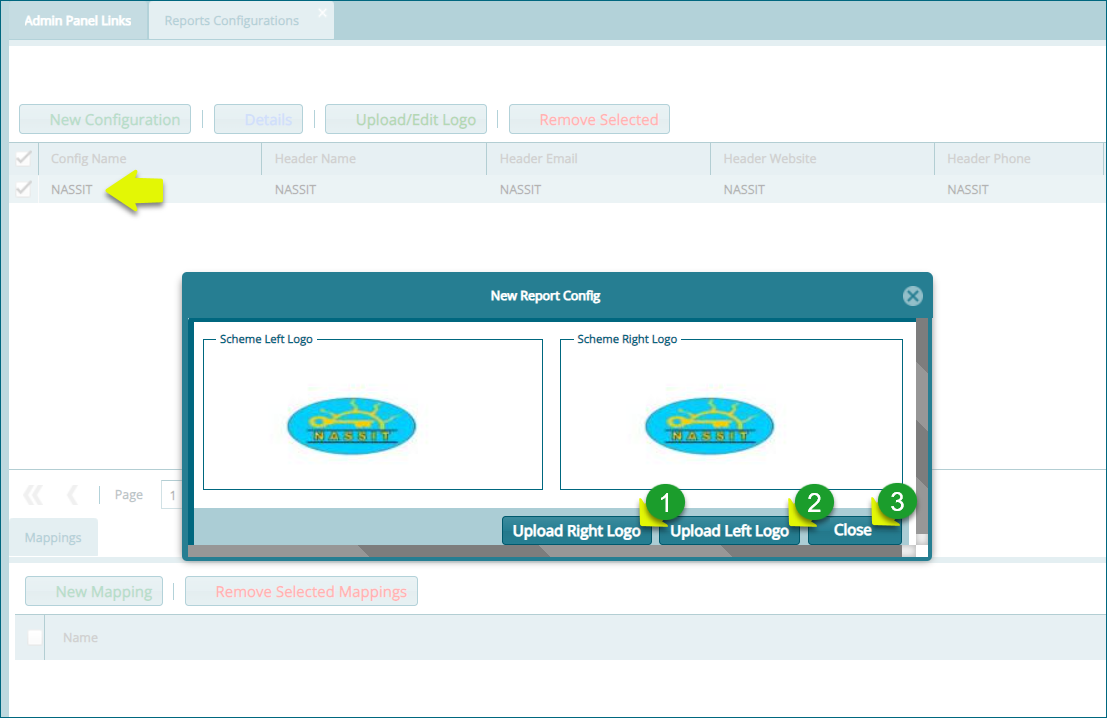
Action
Click label 1 button to open a dialog box where a new configuration is done.
Click label 2 button to view the details of a select report configuration.
Click label 3 button to upload or edit logos that are used on the header of generated reports.
Click label 4 button to remove selected configurations from the list.
Click label 5 button to show the Mapping section on the lower side of the window where an individual scheme is mapped to a report configuration.
Click label 6 button to create a new mapping: connect a scheme to the selected report configuration.
Click label 7 button to remove a selected scheme mapping.
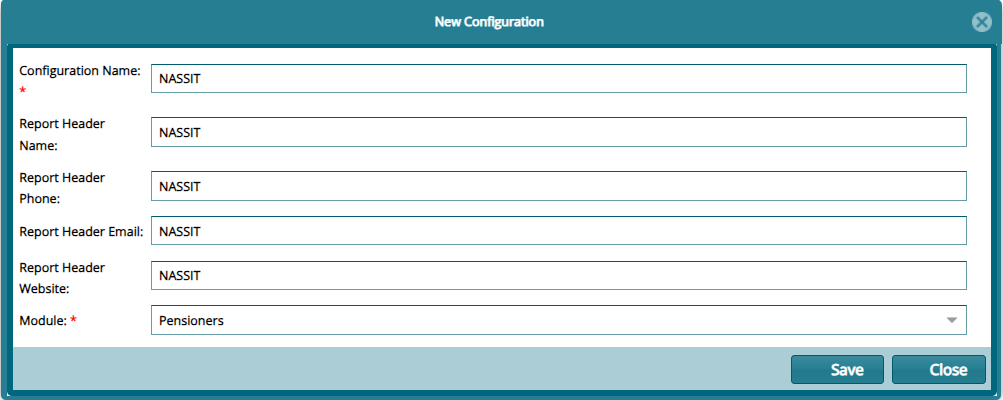
# New Configuration
Click the 'New Configuration' button to open a dialog box where settings for a new report configuration are done as shown below:
# Uploading report logos
To upload logos for use in the system-generated reports, select the configuration whose reports need logos. Locate the list in the report's configuration window. Then click the 'Upload/Edit logo' button to open a dialog box and upload the logos as shown below:
Action
Click label 1 button to upload the logo that goes to the right side of the report's header.
Click label 2 button to upload the logo that goes to the left side of the report's header.
Click label 3 button to close the window after a successful upload.
Click either of the 'Upload' buttons to open a Logo Upload dialog box through which a path to locate the logo from a user's device is provided. Click the 'Upload logo' button to move the selected logo to the system as shown below:

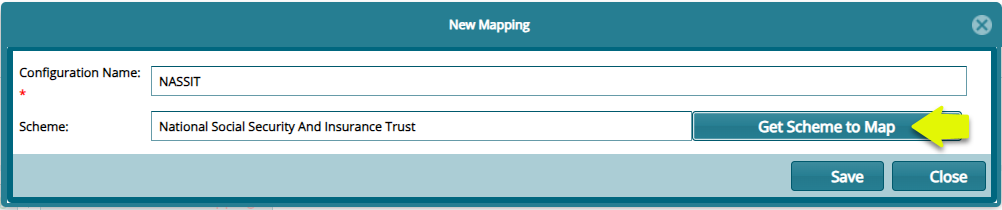
# Mapping Scheme to a Configuration
To map a scheme to a specific report configuration, select the configuration you want to map a scheme to from the list of configurations on the upper section of the window, then click the 'New Mapping' button located in the lower section of the window to open a new mapping dialog box. Type the name of the new mapping and click the 'Get Scheme to Map' button to map the scheme to the set report configuration as shown below:
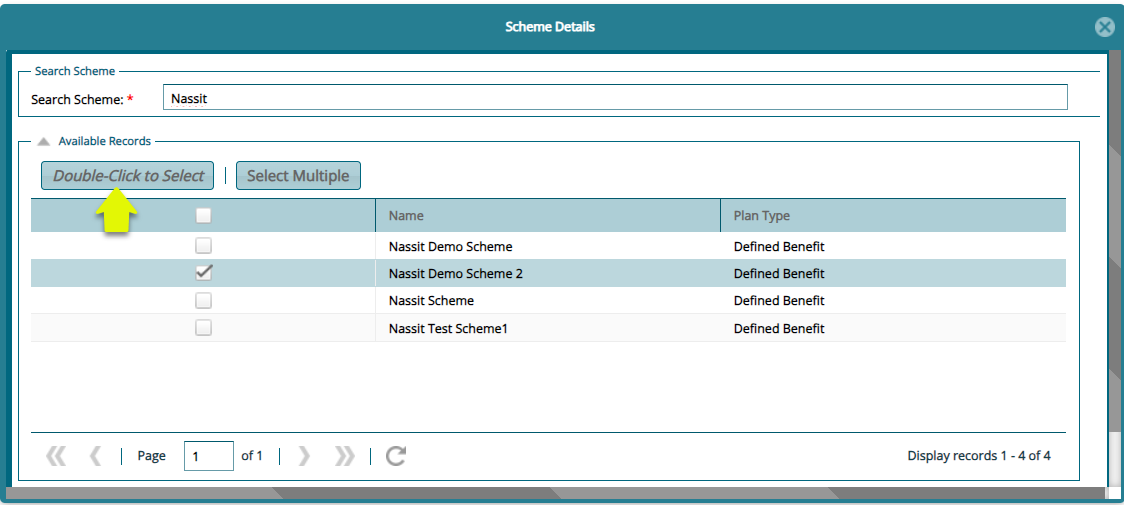
Click the 'Get Scheme to Map' button to open the scheme details window. Search for the scheme you want to map and click the Double-Click to Select button to select the scheme. You can also select multiple schemes by clicking the 'Select Multiple' button as shown below:
# Reports Register
Click the 'Reports Register' link to open the Reports Register window where a list of all report objects from the various module are listed. From this window a particular report can be selected and 'Enables' or 'Disabled' as shown in the screenshot below:
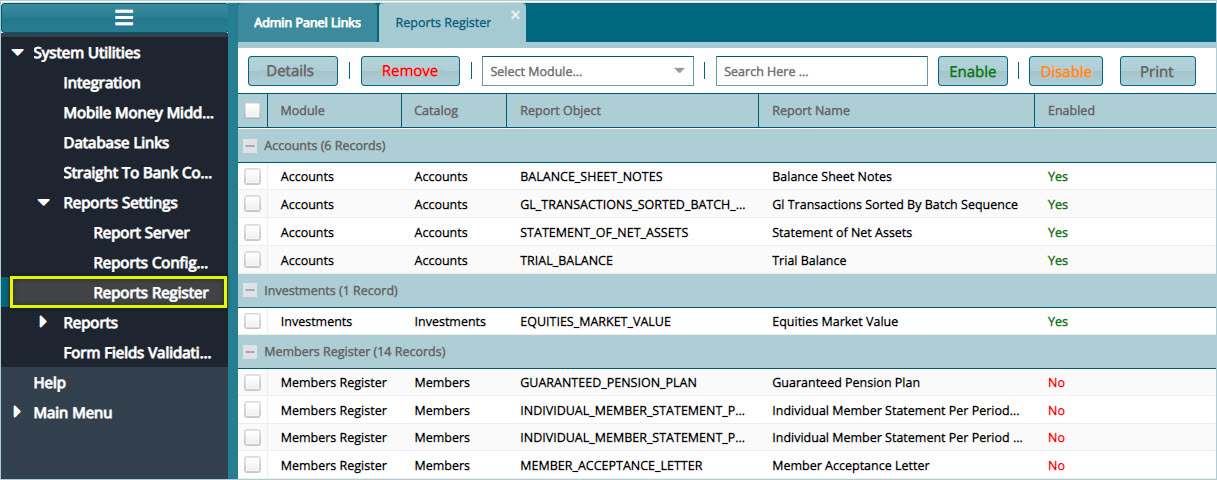
Tip
Select a report from the list and click the 'Enable' button to have the report activated so that it can be generated. Otherwise Click 'Disable' button means the report cannot be generated.
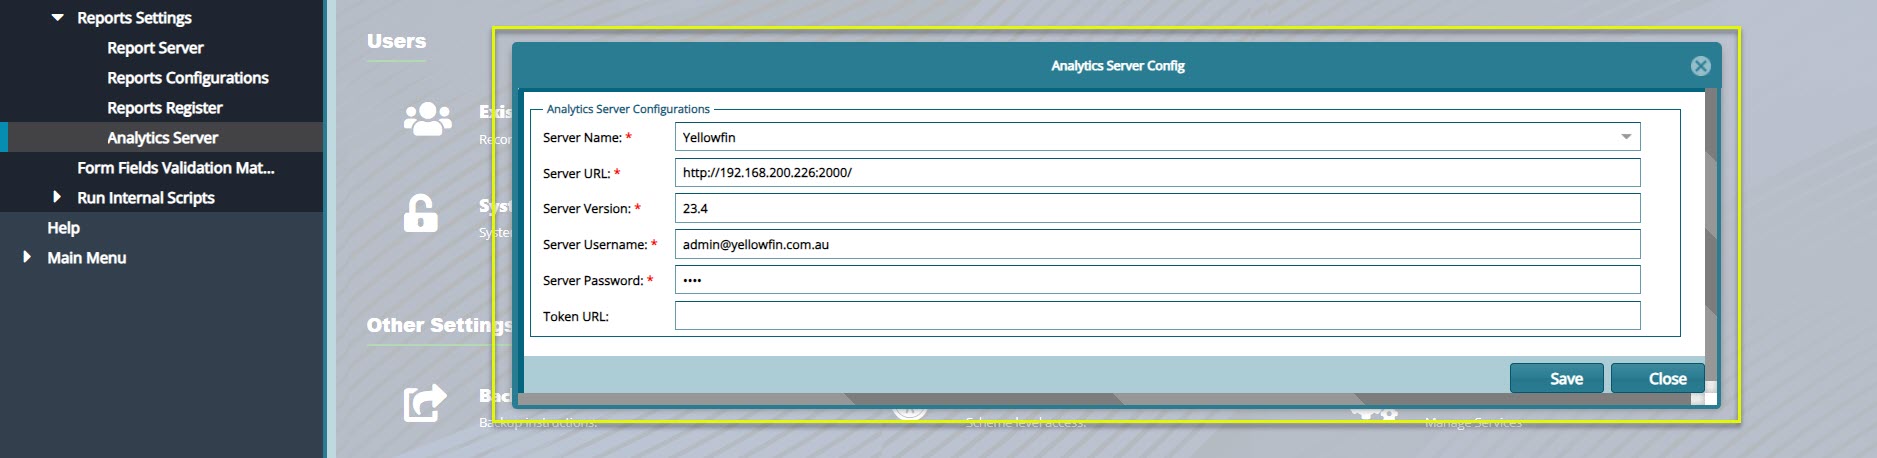
# Analytics Server
Click the 'Analytics Server’ menu item to open Analytics Server Configurations dialog box to configure settings that enable a scheme to connect to the analytics server as shown in the screenshot below:
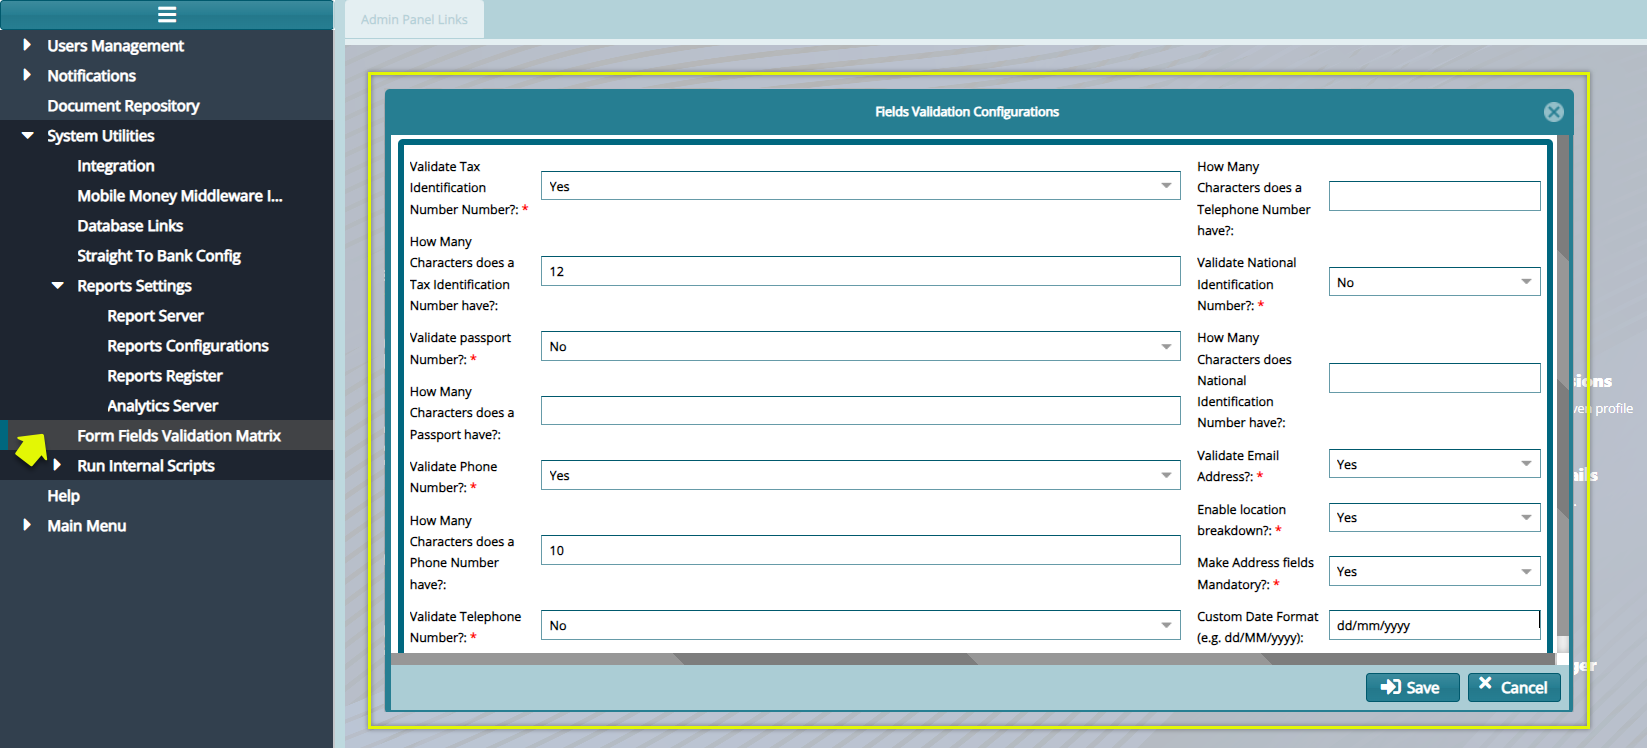
# Form Fields Validation Matrix
The Form Fields Validation Form enables the configurations of various fields validations in a form. See screenshot below:
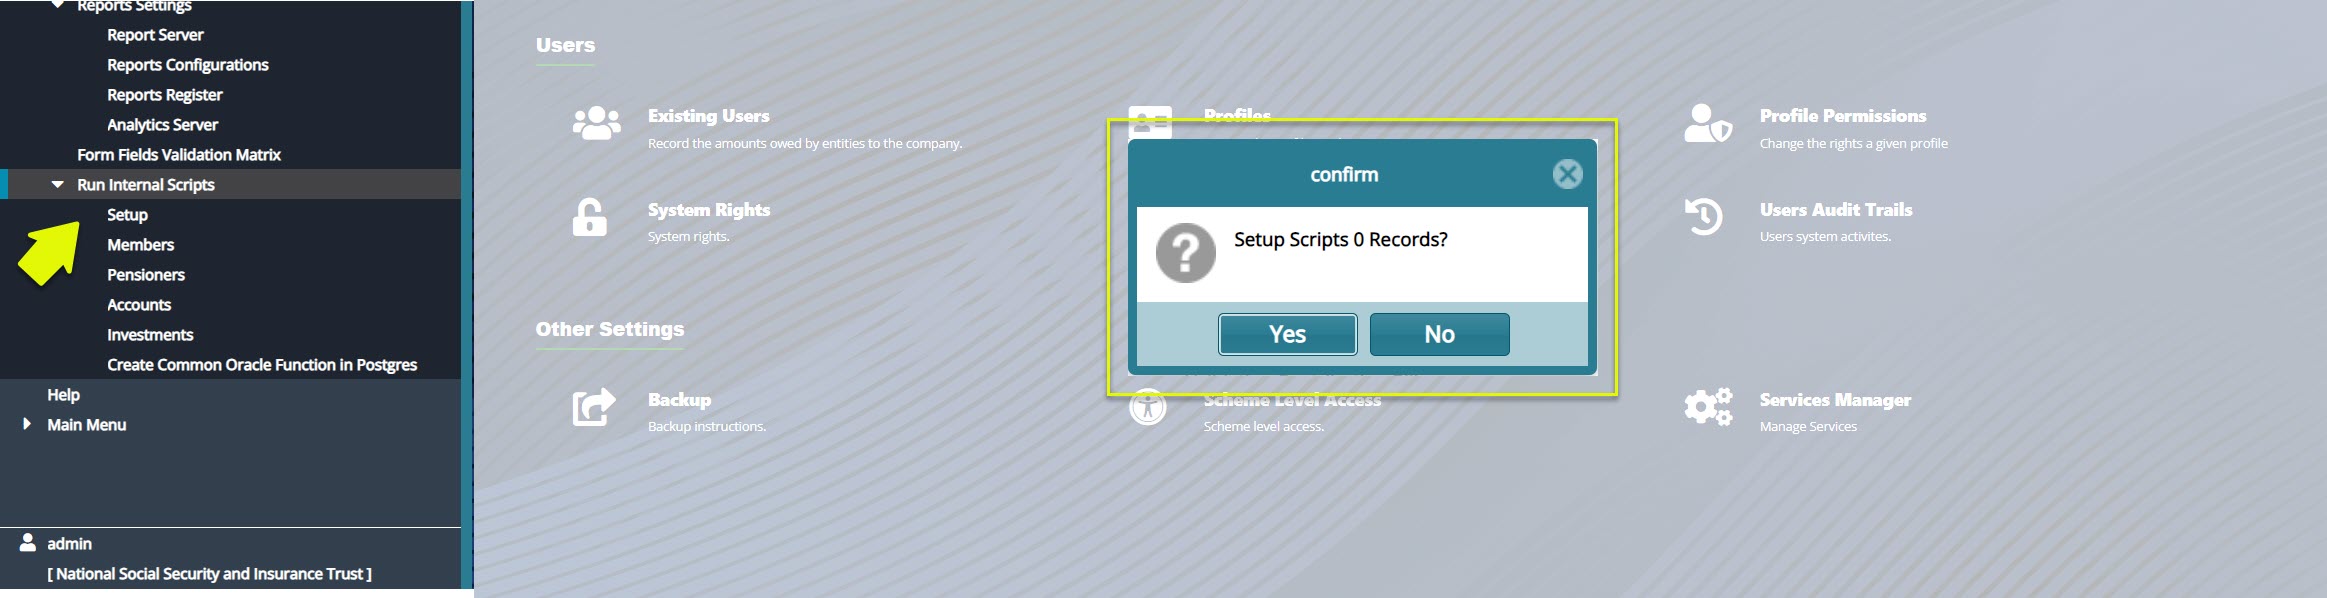
# Run Internal Scripts
This menu provides access to links for running different module scripts. Click a menu item such as Setup from the drop-down menu to load a dialogue box. Clicking Yes will run the scripts allowing the module to run effectively. See screenshot below: