# User Management
User accounts are individual accounts for system users, assigned to specific profiles that dictate permissions for accessing specific system functions.
# Users Register
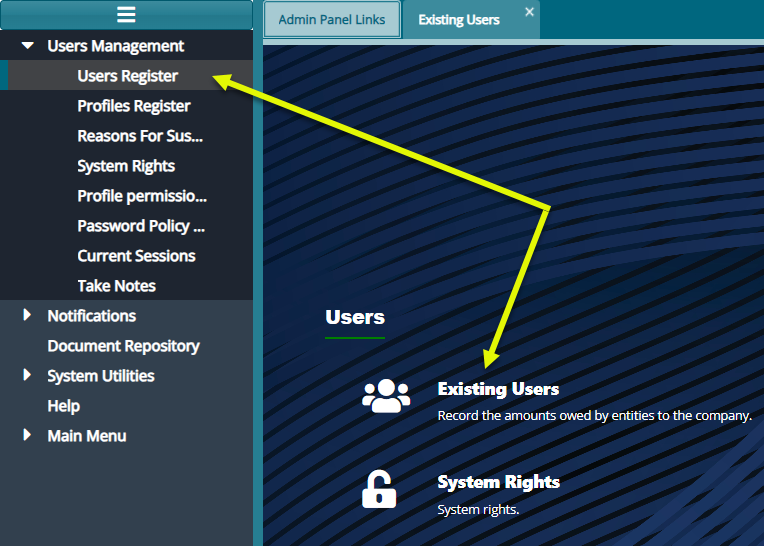
To view current system users, navigate to the 'Users Register' menu on the left side panel and click to open the 'Existing Users' window as shown below:
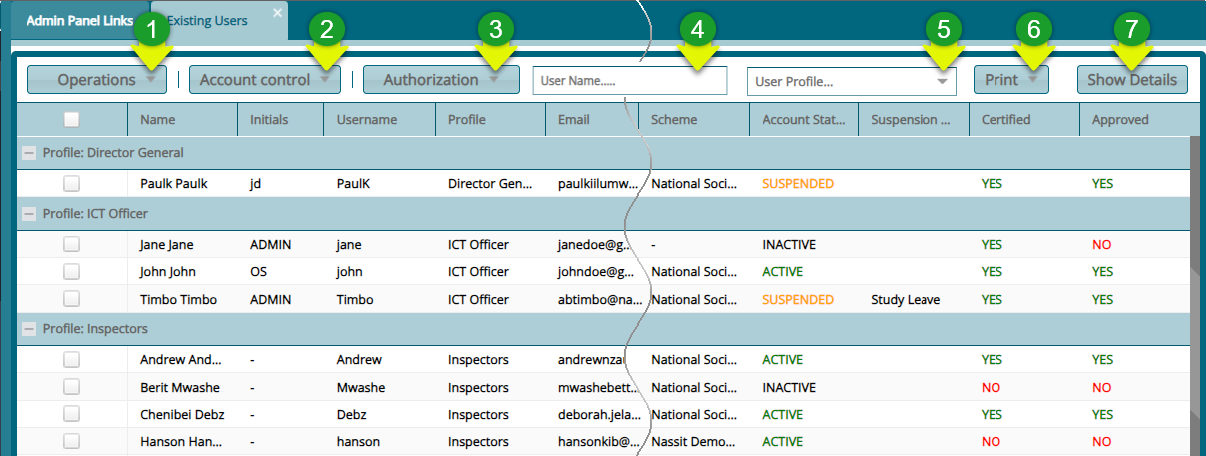
This window displays a grid table listing all system users along with their specific details, as shown below:
Actions
Click the label 1 button to load a drop-down menu and initiate an operation-related process.
Click the label 2 button to load a drop-down menu and initiate an account control-related process.
Click the label 3 button to load a drop-down menu and initiate an authorization-related process.
Click the label 4 and type the name of user to quickly filter the records.
Click the label 5 and select a user profile from the drop-down menu to filter records and display only users under the specified user profile.
Click the label 6 button to view a print copy of the user's details.
Click the label 7 button to open a section on the lower side of the window, revealing various details of a selected user.
# Operations
# New User
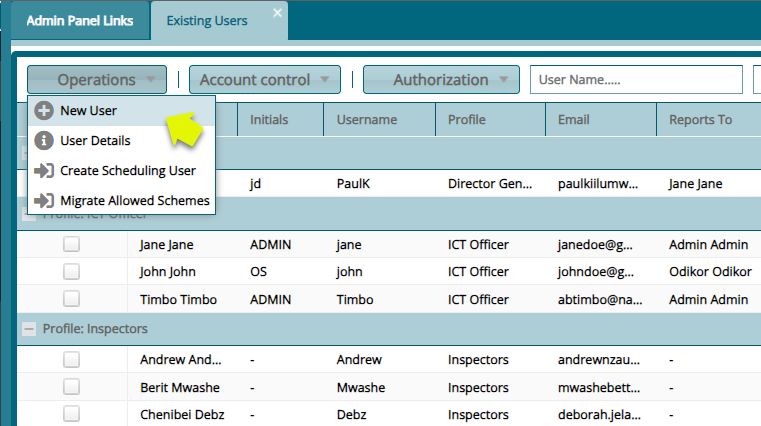
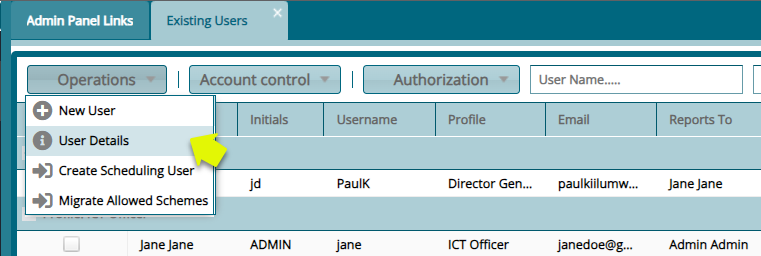
To add a new user, find the 'Operations' menu, and from the drop-down list, click 'New User' as shown below:
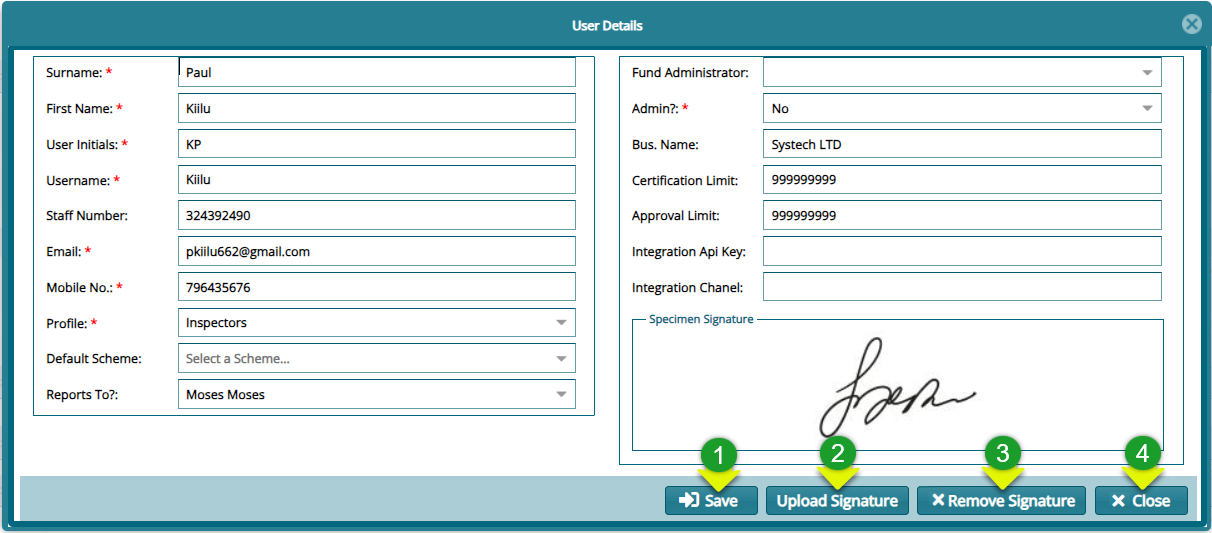
Clicking the 'New User' will open 'User Details' form where the details of the new user are captured. See the screenshot below:
Action
Click button labeled 1 to capture the details as typed.
Click button labeled 2 to attach the user's signature.
Click button labeled 3 to remove the current signature from the user's records.
Click button labeled 4 to exit the user details dialog box.
# Users Details
To access adsditional details about a user's account, including user role, schemes, sponsors, modules, and member classes allowed for access, click 'Details' from the Operations menu as shown below:
This action will open a lower section displaying comprehensive information about the selected user, as depicted below:

Action
Click button labeled 1 to view the scheme the user is allowed to access.
Click button labeled 2 to view the sponsors the user is allowed to access.
Click button labeled 3 to view the member classes the user is allowed to access.
Click button labeled 4 to view the modules the user is allowed to access.
Click button labeled 5 to view the roles the user is allowed to play.
# Allowing Schemes Access to Users
To grant specific schemes access to a user profile, locate the 'Allowed Scheme' tab, and click to reveal a table listing the user's current schemes. Click the 'Assign Schemes to User' button to view all schemes available in the system, as depicted in the following screenshot:

Action
Click the button labeled 1 to open a dialog box listing all available schemes from which new schemes can be selected and added to a user's account as to be shown in the following screenshot.
Click the button labeled 2 to open a dialog box listing all available schemes from which new schemes can be selected and added to the profile category of the user.
Click the button labeled 3 to remove select schemes from a user's assigned schemes.
# Assigning Schemes to a User
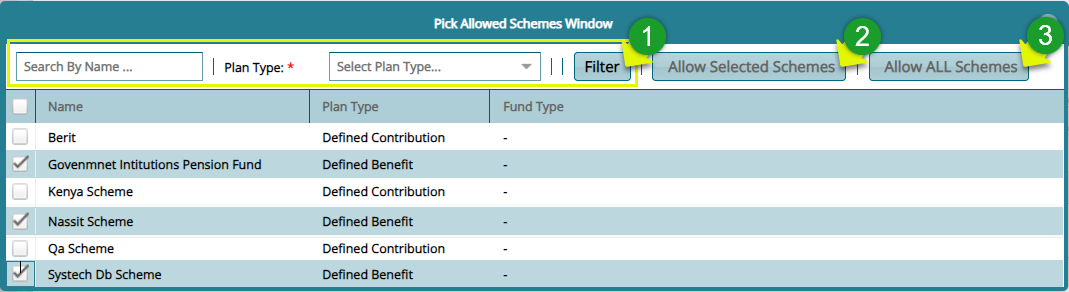
Click the 'Assign Scheme to User' tab to open a grid table listing all the schemes that can be added to a user account as shown below:
Action
Click the label 1 button after typing a scheme name in the search box and selecting the Plan Type from the drop-down menu to quickly find a scheme from the list.
Click the checkboxes to select schemes, then click label 2 button to allow a user access to the chosen schemes.
Click label 3 button to provide a user access to all available schemes.
Note: To allow a user access to Sponsors, Member Classes, follow the steps taken to add schemes to a user as shown in the previous section.
# Assigning Modules to a User
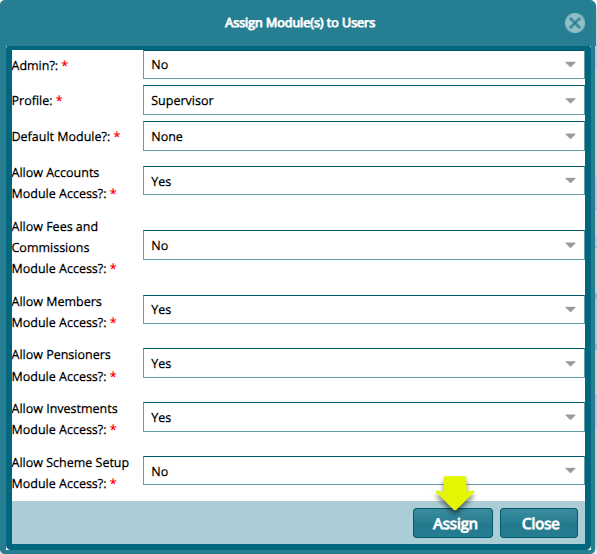
To assign specific modules to a user, click the 'Module Access' tab to open a grid table column showing the modules that can be added to a user account as shown below:

Click 'Assign Module(s) to User' to open a dialog box for selecting the modules to allow a user access. Select the modules and click 'Assign' to allow a user access as shown below:
# Profiles Register
User profiles representing distinct groups of users with specific privileges. A system Administrator profile is created by default and serves as a foundational template from which other profiles are derived.
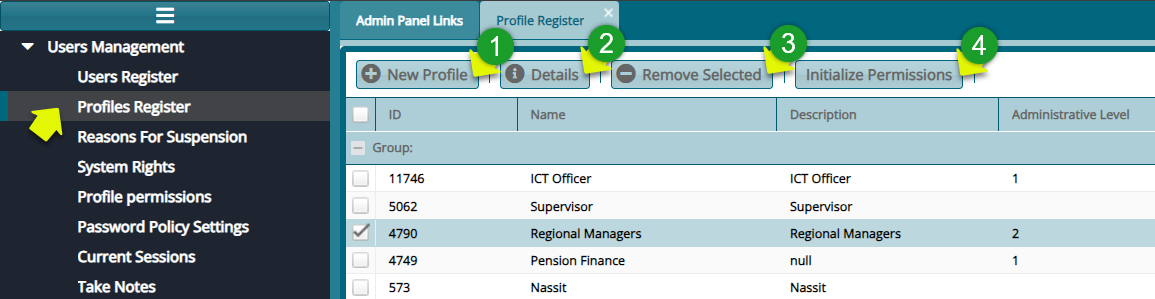
To engage with profiles, click Profiles Register' and access the Profile Register window with a grid table listing the profiles created within the system as shown below:
Action
Click label 1 button to create a new profile to the system.
Click label 2 button to view the details of a selected profile.
Click label 3 button to delete a selected profile from the system.
Click label 4 button to initialize permissions for a profile.
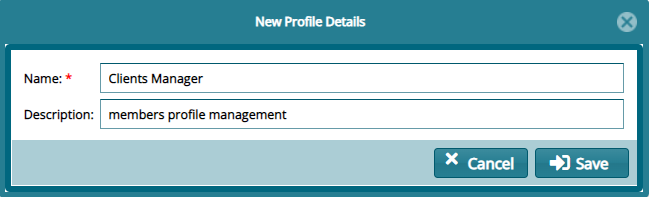
# New Profile
Click "New Profile" tab to open a dialog box. Through this, a new profile can be created by providing the profile name and a description as shown below:
# Reasons For Suspension
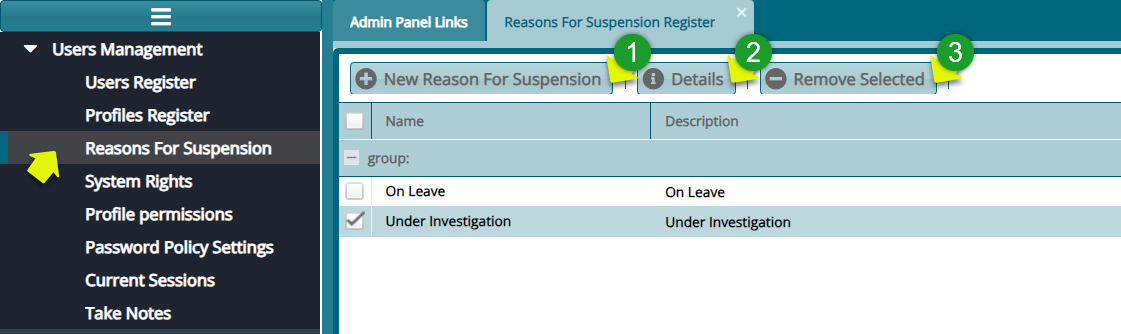
The 'Reason for Suspension Register' window displays a list of reasons why system users can be suspended from using the system. New reasons for suspension can also be added as shown below:
Action
Click label 1 button to add a new reason for suspension
Click label 2 button to view the details of a selected record from the list
Click label 3 button to delete a selected record from the list
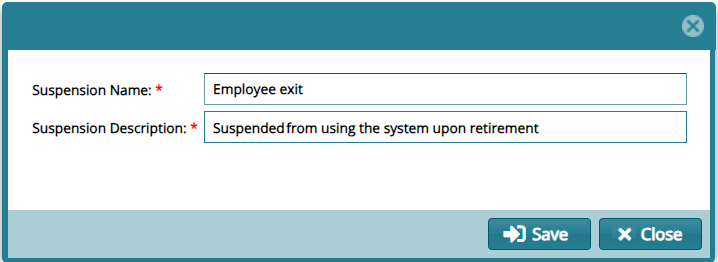
# New Reason for Suspension
Click the 'New Reason for Suspension' button to open a dialog box. Through this, a reason for a member's suspension from using the system is recorded as shown below:
# System Rights
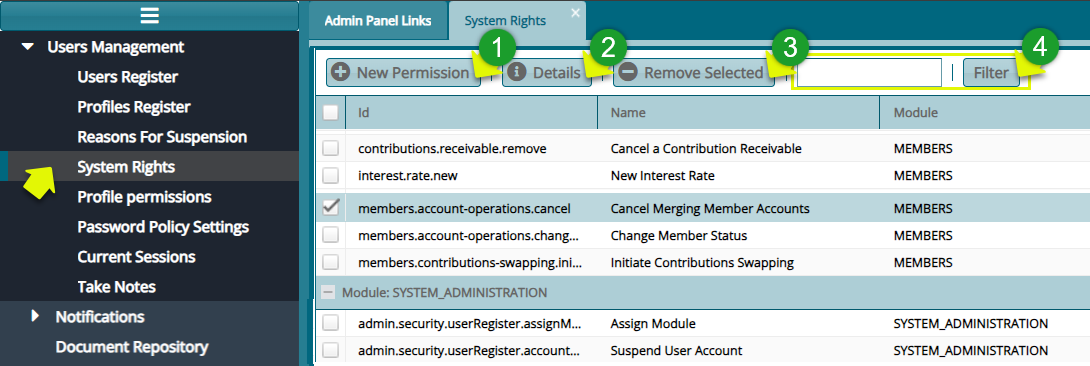
Click 'System Rights' to open a window listing all the system rights grouped based on modules. A user can create a new system permission, view the details of a selected permission in the list, and remove one among other actions. See the screenshot below:
Action
Click label 1 button to create a new system permission identifier
Click label 2 button to view the details of a selected record from the list
Click label 3 button to delete a selected record from the list
Click label 4 button to filter records by key words typed on the adjacent text box
# Profile Permissions
Once a system user profile is created, the next step is to allow access to specific system rights to a newly created profile. The permissions given enable a user profile access to certain system functionalities.
# Step 1: Assigning Permissions to a user profile
To assign permissions to a profile, click the 'Profile Permissions' menu to open the profiles permission window with a grid table where permissions are assigned to profiles. The table provides drop-down menus to choose profiles and the modules whose permissions are to be assigned to a profile among others as shown below:
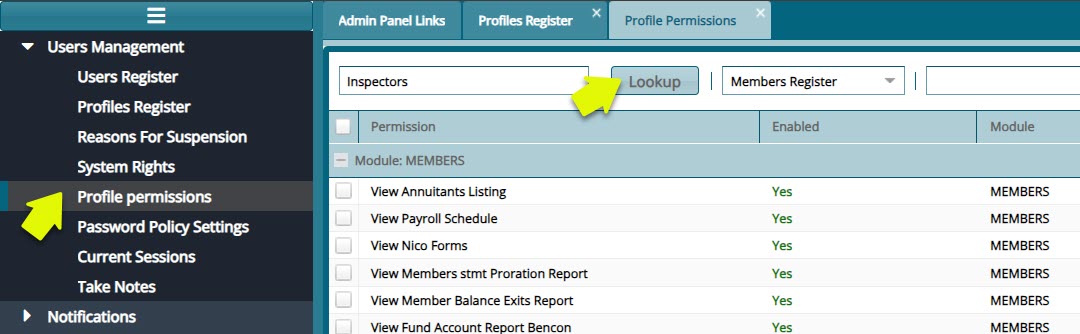
Action
Click the list box labelled 1 to display a drop-down list of User Profiles and select a profile.
Click the list box labelled 2 to display a drop-down list and select a Module.
Click the filter button labelled 3 to search for a record based on the name typed on the adjacent search box.
# Step 2: Enabling Permissions
Select 'Permission' from the list and click the 'Enable' button to activate the permissions in that profile as shown below:
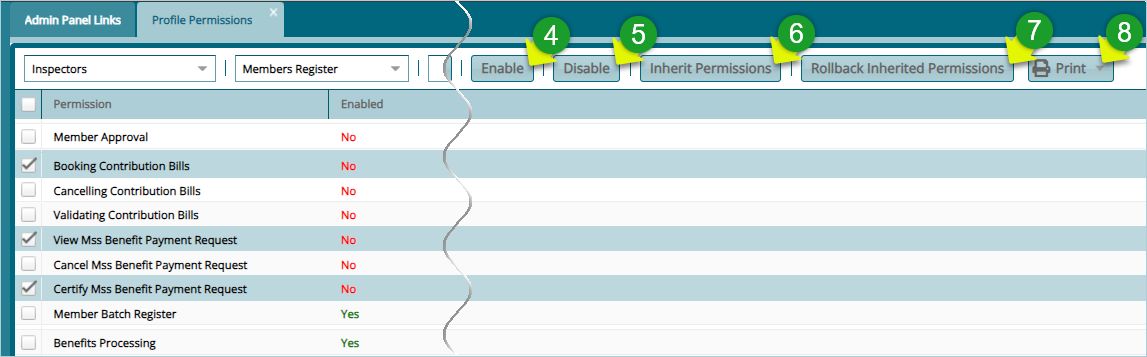
Action
Click to select Permission(s) from the list and click button labelled 4 to activate. See records labelled No.
Click to select Permission(s) from the list and click button labelled 5 to deactivate. See labelled Yes.
Click the button labelled 6 to inherit Permissions from another user profile.
Click the button labelled 7 to undo the inherit process.
Click to select an option from the print drop-down menu labelled 8 to view a print layout copy of permission details.
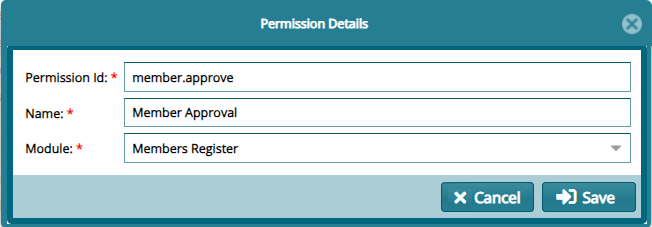
# New Permission
Click the 'New Permission' button to open a dialog box. Through this, a new permission is created by providing details of the new permission as shown below:
# Password Policy Settings
Click 'Password Policy Settings' to open a dialog box. Adjust the password policy settings based on the configuration provided below:
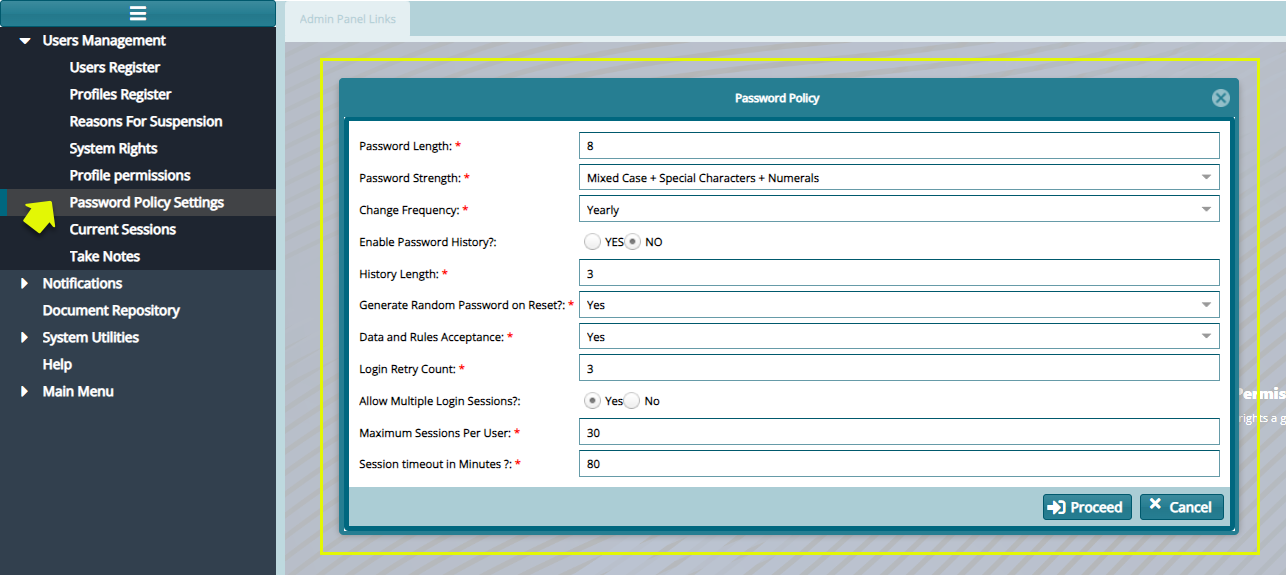
Action
- Enter the required details into the form text fields and click the 'Proceed' button to apply the policy changes. If you wish to discard the changes, click 'Cancel' to exit the process.
# Current Sessions
Click on 'Current Sessions' to open the respective window. Inside this window, you will find a list displaying all currently logged-in users, as illustrated in the screenshot below:
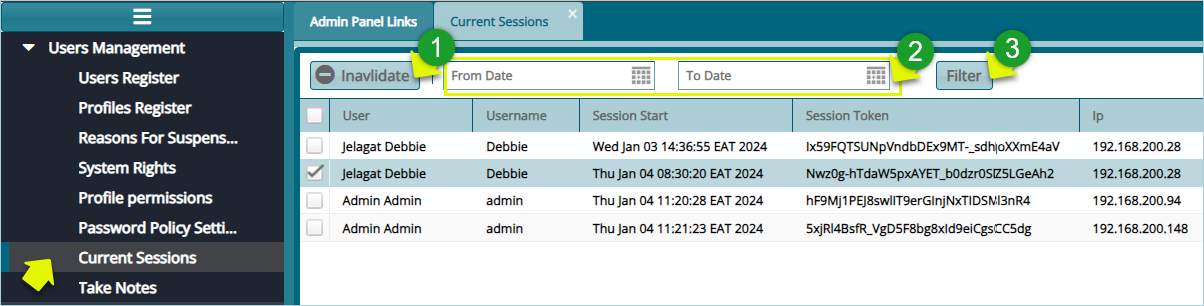
Action
Click the list box labelled 1 to log out a selected user from the system.
Click on the date filters labelled 2 to pick the start and end date to filter records.
Click the filter button labelled 3 to filter records based on the set dates.
# Take Notes
Click on 'Take Notes' to open the Notes window. Inside this window, you will find a list displaying all current notes written by various system users as shown in the screenshot below:
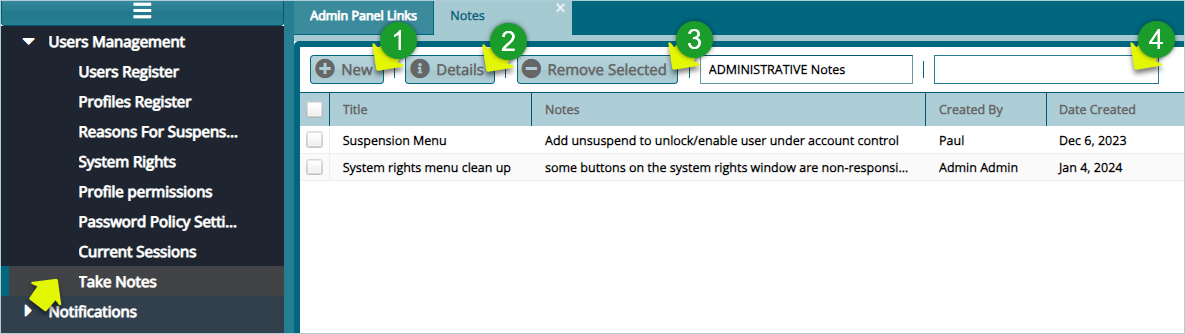
Action
Click label 1 button to create a new note in the system.
Click label 2 button to view the details of a selected Notes record from the list.
Click label 3 button to delete a selected Notes record from the list.
Click label 4 search box and type key words to filter records.
# New Note
Click the 'New' button to open a dialog box. Within this window, enter the details of the new Note as illustrated below:

# Audit Trail
Click 'Audit Trail' to open the corresponding window. In this window, a list of all key activities within the system, attributed to active users, is generated, as shown in the screenshot below:
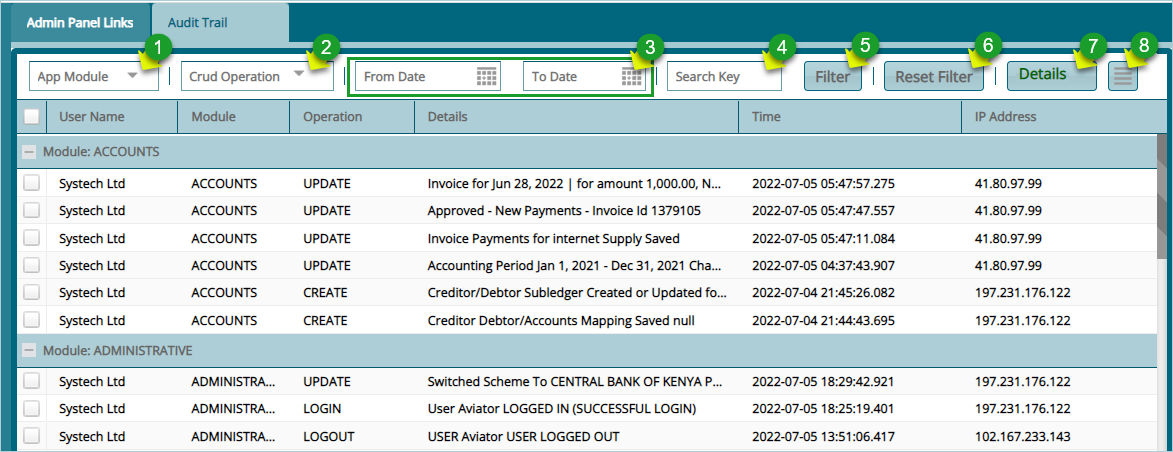
Action
Click on the label 1 textbox to open a drop-down menu. Select the module (e.g., pensioners, accounts) to filter log records.
Click on the label 2 textbox to open a drop-down menu. Select the type of operation (e.g., update, create, delete) to view logs for that specific operation.
Click on the label 3 date fields and choose dates to filter records based on the selected time range.
Click on the label 4 text field and enter keywords to filter logs in the list based on specific criteria.
Click on the label 5 button to filter records according to the set parameters.
Click on the label 6 button to repopulate the list after using the filter.
Click on the label 7 button to view the details of a selected log record from the list.
Click on the label 8 button to access links for printing audit reports and other operations.